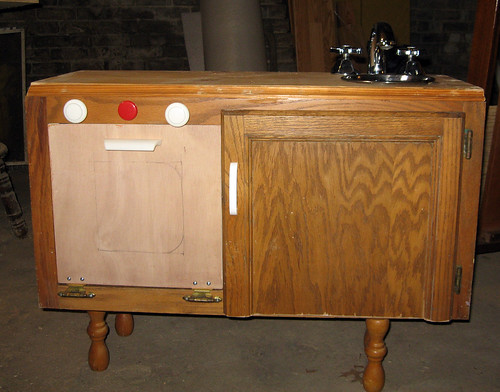
A trip to ReStore and then to our junk-laden basement, and a design developed. Starting with a cabinet we removed from our kitchen, I figured I could paint a couple burners on top, add a sink and faucet, and in front, put a cupboard and oven door.
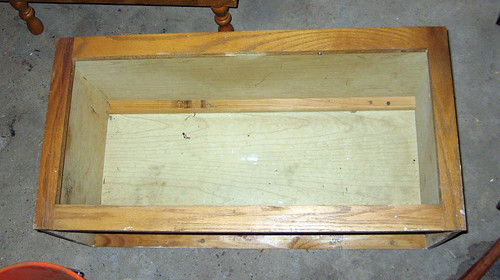

It needs a little height, so I'll attach it (somehow, not sure) to this shelf thing (from a previous project, a part that doesn't get used anymore).
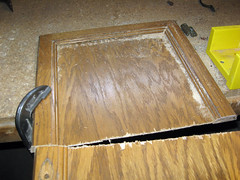
I took a cupboard door off another spare cabinet to make the door. I had to cut it down to make it fit. If I get really ambitious, I will try to cut the trim and glue it back together. I doubt such ambition will strike, however.
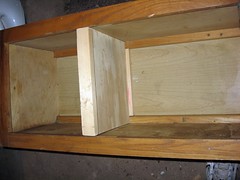
The inside needed a divider, since you can't bake stuff in a cupboard. Some wood from the basement did the trick for that. I found shelf supports and drilled new holes so that the oven and cupboard could both have one shelf inside.
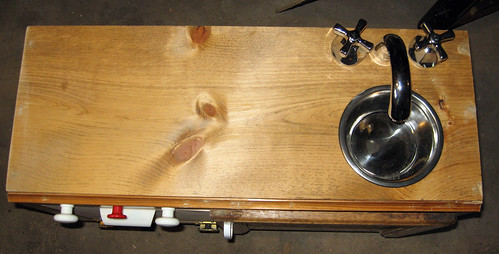
I cut holes in the top to fit a faucet (thanks ReStore!) and sink (dog dish!). Miraculously, their undersides fit between the top piece and top of the cabinet, so I won't have to cut out holes in the cabinet. The bowl/sink sits about 1/4" above the counter top, but some caulk will take care of that (and keep the bowl in the hole).
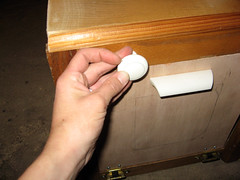
There is always a point in any project I do where I do things out of order or backwards or upside down. And I have to rip out, undo, or break things to correct the error. I hit that point today when I nailed and glued the top pieces on the cabinet, then tried to put the oven/stovetop knobs on the front.
Since they need to be screwed in from behind, and I had just sealed off said behind, I had to pull the top off. Luckily, it came off pretty easily. The knobs were installed (also ReStore parts), and the top replaced.
After that, I decided to call it a day. Boozle will likely be waking up from her nap soon anyway.
Still remaining to do: oven needs a cutout with plexiglass (so you can see the pizza baking!); shelves need to be cut; lots of cleaning, painting, and probably some contact paper to be applied. Oh, and those legs need to be attached.
To be continued! [part 2]
No comments:
Post a Comment