Thursday, April 1, 2010

Update: Overalls project

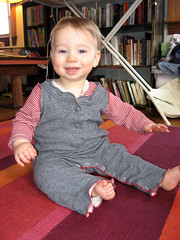
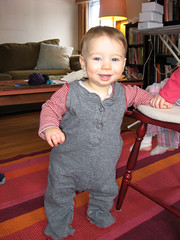
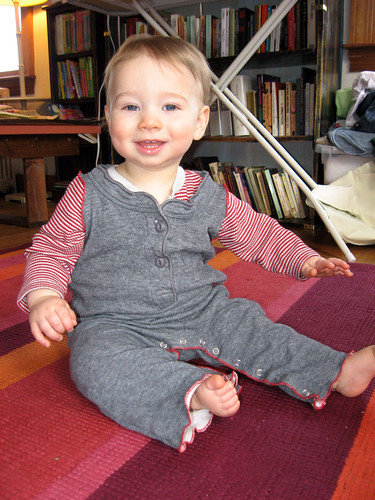
Jasper in his baggy overalls

I sewed the cuffs on the pant legs in the hopes that they would keep the pants in place a little better when Jasper crawled around in them. Fail. They're cute--I used the serger to flatlock them on with the red thread, so it's cute and all, but as soon as he started crawling away (i.e., immediately), they got all bunched up again.


But, the good news is that they might now be big enough for him to wear next fall, and he probably won't be crawling too much by then. So perhaps this post will get a third installment around October or so.


new cuffs

See the original post on these overalls here.

Wednesday, March 24, 2010

project idea: toy workbench

When Alma was about 18 months old, I made her a play kitchen out of an old cabinet and other recycled materials. She still uses it, and Jasper (now 11 months) does too. This summer, once we've fixed up the little corncrib in the back yard into a play house, I think the kitchen is headed to the play house. Which led me to think about what else should be in the play house... and I think a work bench is in order. The kids certainly see lots of construction/building/sawing/etc. work going on around the house, so it seems a natural for our family.

BUT I can't find good examples of DIY play workbenches out there on the internets. The kids' design blog Ohdeedoh posts examples of DIY play kitchens every day (or so it seems). There is a Flickr group dedicated to DIY play kitchens. But play workbenches? Not so much. So far, I've found a play kitchen that can convert to a workbench (but there are no photos of what the workbench would look like).

And I found one (YES just ONE!) example on flickr.

Hmm. I've found play workbenches for sale (like this one), which is helpful but I need ideas for a homemade version.

I'm thinking pegboard needs to be involved. What else? We've got a toy tool set and could get some more. But that's accessorizing. Hmmm.

Saturday, February 27, 2010

Baby overalls from an old shirt

baby overalls from an old shirt

So I got a snap press this week. It's very exciting. For me. Maybe not for you. But now I can make baby clothes with all those crotch/leg snaps without having to deal with snap tape or--even worse--a hammer and that cheap plastic clamp thing Dritz makes that I hate.

Anyway, this snap press is great for converting velco diapers to snap diapers (and since we have a bunch of diapers with useless, wasted velco, that's a great thing.) But that's not the project I'm excited about right now.

I've been pulling out my old clothes that I no longer wear--the Hartstings truck is making a stop at our house next week. But in the case of some of my old clothes, I don't like the garment itself anymore, but I do still like the fabric. And this L.L.Bean shirt is a perfect example. I've had it since junior high or so, so it's super soft. It's wool jersey on the outside and soft cotton jersey on the inside. Sounds like some nice warm, soft baby overalls are in order!

So the shirt I started with is the L.L. Bean Two-Layer River Driver henley shirt. It doesn't look like they still make the exact same thing, but here's the crew neck version. (no I wasn't smart enough to take a picture of the shirt before I hacked it to bits.) The nice thing about the henley style is that, if you preserve the neck band, you've got the front buttons in place to make it easy to take off baby's head (then again, most adult neckbands are probably big enough to take over a baby's head.)

Anyway, I set out to make the overalls with the serger. And with one little exception, I didn't need the regular sewing machine at all. The plan was to use the roll hem on the armholes, inseam, and leg cuffs and the 4-thread overlock on the seams. It wound up being a pretty easy project--one I could probably have finished during Jasper's nap if a) I hadn't been figuring it out as I went and b) he'd taken a decent nap today.

So this is not exactly a tutorial--I won't go into that much detail--but more like loose instructions that someone who's pretty adept at using the serger could probably use to figure it out. Or it's just a really vague tutorial.

First, I cut all the pieces out.

baby overalls -- pieces cut out from shirt

I cut out the body, keeping the bottom hem in place as well as the neck line. I used another romper as a guide to where the crotch and armholes should be. Note that he's about a size 18 months and the length of the shirt worked well. Smaller sizes would need the bottom cut too; larger would need something sewn on the bottom. (More on that later.) I also cut out the crotch extension piece and a facing for the back snap opening. I cut off the cuffs too, though I wasn't sure if I'd use them. (For taller babies, this is an easy way to add some length.)

First, I sewed the crotch onto the back of the overalls. (I first basted with the sewing machine because I needed to ease the pieces together and I wasn't too confident that I'd do that well with the serger. A more experienced serger could skip that step.)
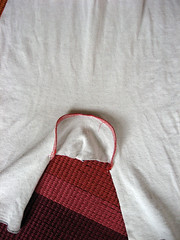
overalls bottom

Then I serged the snap facing to the legs and crotch.

overalls bottom

Next I roll hemmed the arm holes, the edges of the inseam and snap facing, and, since I was using contrasting thread, the bottom of the legs too.

neck and armholes

Then I serged the sides and put snaps all along the leg openings. Ta da!
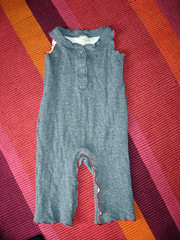
baby overalls from an old shirt

And found a model:

baby overalls from an old shirt baby overalls from an old shirt

Beautiful! Until he started moving around in it. That's when it occured to me that adding the cuffs to the legs might come in handy. He's a crawler/cruiser, and tends to crawl out of the legs.
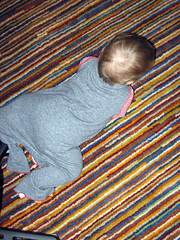
baby overalls from an old shirt baby overalls from an old shirt

So I will add some cuffs tonight and add an epilogue to this post once I get some new pictures.

Friday, February 26, 2010

Hide that Projector Screen!

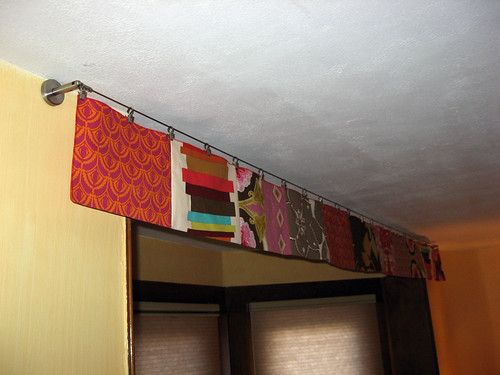
Valance hides the retracted projector screen

We are computer TV watchers. We don't own a TV, but I'm not going to brag about that, if only because we watch SO MUCH TV anyway. Hulu. Netflix watch-it-now. Itunes. And so on.

But we were getting a little tired of watching TV and movies on the computer screen. It wasn't a tiny screen, for a computer, but for watching from a little distance, meh.

So we splurged on something we'd talked about getting for years, a projector. We first talked about getting a projector when we lived in an A-frame house with white angled walls. The image would project on the walls and we could sit back to watch it...it would have been lovely if the cost of a projector wasn't approximately one month's salary for us [full-time students] at the time.

Anyway, fast forward to the present. We got a projector. We mounted a screen just inside a big, floor-to-ceiling, bay window. Which was perfect, except the big metal screen tube isn't so pretty, and sitting inside the pretty window it was a bit of an eyesore. So I wanted to hide it when it was retracted, but in a way that didn't get in the way when we pulled the screen down to watch something.

Ta-da! A simple valance. It's short enough that it doesn't block the screen but long enough to totally hide the retracted screen. It was simple enough that I could make it quickly, but it's made with such nice printed fabrics that it doesn't look slap-dash.

Valance hides the retracted projector screen

I started by mounting Ikea's Dignitet curtain wire across the front of the window. I measured the width of the wire (110") because I wanted an unpleated, flat hanging valance. I also measured how far down the retracted screen fell from the ceiling and added an inch for good coverage (7 1/2").

I had a stack of gorgeous fat quarters I had ordered from Anna Marie Horner for a different project (also a valance project, but for a different room. I'd abandoned that valance for reasons I might discuss some other time). I had bought two sample packs of the Drawing Room home decor collection, which included 12 fat quarters. (By the way, if you haven't seen the prints available from Anna Marie Horner, take a peek at her store--she makes flannels, home decor, and cotton quilting fabrics in the most lovely prints.)

I picked 7 prints and from them, cut 11 rectangles:

  • 10 1/2" wide, for 10" plus 1/4" seam allowances
  • by 16" tall, for 7 1/2" height, folded over, with 1/4" seam allowances

I placed them on the floor to get them in a nice order, and then serged them together. I pressed the whole piece in half, lengthwise, and then (with the serger) roll-hemmed the entire edge (i.e., the two side edges and the two top edges. The bottom edge is the fold.)

I used the Digitet clips to hang it, and voila, there it is.
Valance hides the retracted projector screen

Resurrection

Hereby declaring that I'm resurrecting this web site. I've been working on so many projects for our new house; I feel that writing about the projects (in progress and post-mortem) will help me develop as a crafter, make better stuff, and feel a more profound sense of accomplishment. I tend to forget how much stuff I've created, and then I feel like I haven't accomplished much in our house. But I've done a lot!
  • roman shades in the sun room
  • valance to hide the projector screen
  • curtains, cushions, for Alma's window seat
  • blackout shades for Jasper's room

and lots more that isn't immediately coming to mind.
So here's to new beginnings.

Monday, May 19, 2008

Play Kitchen, part 2

I finished the kitchen! It's set up in the (real) kitchen now, and it appears to be a stunning success. Boozle washes her hands, bakes pizza, and boils pizza toppings.

Here's a video of her first time playing with it:


And some photos of the finished product:

Play Kitchen, done! Play Kitchen, done!

[continued from Play Kitchen, part 1]

Sunday, May 11, 2008

knit dress

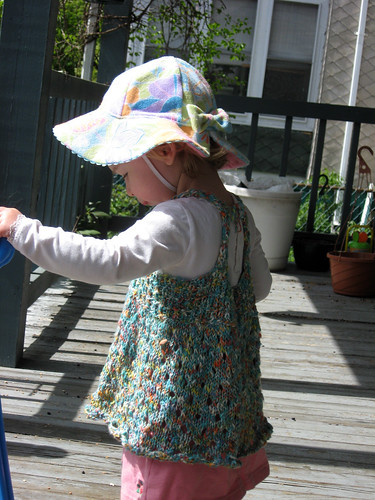
Last night I finished a knit dress (er, tunic? it's short.) for the Boozle. It was an improvised design, so I'm happy to report that it fits and looks cute! The straps fall off her shoulders, so it needs a tie in the back to keep them together, but a piece of yarn sufficed for today. I'm also happy to report that she likes it (she saw me knitting it, and wanted to wear it long before it was done), and that she did not spill anything on it today (other than some plain noodles)!

I will post the pattern once I get it together.

big smileknit dress, on the porch

close upknit dress, back